Showing posts with label Techniques. Show all posts

Monday, 18 February 2013

Preparing a simple path for the laser cutter.

One of the most basic things you can do with the laser cutter is trace an outside path of a shape to be cut out from sheet material. Like the previous posting on laser cutting please speak to your friendly technician to advise you on the use of appropriate materials.

You will also need the line you draw saved at a specific colour and width, again check with the technician who will be running the job.

This method shown below is to draw the path freehand, using the Pencil Tool. This is a basic drawing tool that will automatically place Anchor Points at regular intervals. The downside is that it is not very accurate a drawing method and for accuracy you will need to edit and tidy up any lines afterwards.

1. Place the image you want to trace by using File, Place... and select the image.

2. Before you place the image you can select the checkbox allowing you to add the file as a Template.
This will lock the image, dim it slightly and create a new layer for you to draw into in one go.
Depending on the original size of the image you place you might need to resize it to make it bigger or smaller. If you do you will need to unlock this first in the Layers Panel. Re-lock it once you have made any adjustments as you don't want to draw on this layer or have it move.

3. With your new layer selected select the Pencil Tool and start to draw around your image.
You will probably find it quite difficult to draw an accurate line with the Pencil Tool and the line will look very shaky. It will appear this way until you release the mouse button at which point the line will smoothen out and look better.
4. The line will probably need editing so that it is in the correct position, ready for cutting.
You can redraw the line to change it but first you will need to check a couple of settings for the Pencil Tool.

5. Double Click on the Pencil Tool. This will open the Pencil Tool Options. Make sure Keep Selected and Edit Selected Paths are checked.

6. With the path you have just drawn, click and drag to redraw a new line. This will replace the original one. This can produce unpredictable results sometimes so be ready to Undo and try again. Reducing the Fidelity can help here.

7. If you need still smoother lines you can use the Smooth Tool which is found by click holding on the Pencil Tool or if you already have the Pencil Tool selected by holding down the Alt key.

Each time you draw over the existing path the line will become smoother.

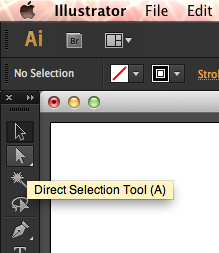
8. Depending on the complexity of your shape you can edit this line as you go using the Direct Selection Tool or using the Pen Tool.

You will also need to think about making sure your lines are joined together and continuous ready for the laser cutter to follow. Use this blog entry for more info.

Tuesday, 12 February 2013

An easier way to draw. The Pencil Tool.

The Pencil Tool in Adobe Illustrator allows you to draw freehand paths that you can edit later on.
Some if not most will find this method of drawing easier that using the Pen Tool. The downside is that the line you end up with will need refining and editing to make it more accurate. There are settings for this tool that you can tweak to make life easier for yourself. You will also find that if you are drawing using a Wacom Graphics Tablet instead of mouse, the results will be better already.

The Pencil Tool (shortcut N) draws a line where you drag the cursor and will add Anchor Points automatically along its length.

This line will usually need to be edited and refined using the Direct Selection Tool (shortcut A)

Hidden under the Pencil Tool is the Smooth Tool which will smooth the line you have just drawn with each pass. You can also access the Smooth Tool by holding down the Alt key when you have the Pencil Tool selected. This saves you time by not having to switch between one tool and the other.

If you double-click on the Pencil Tool you get access to the Pencil Tool Options. Here you can set the Fidelity and Smoothness of the line you draw. The higher the Fidelity, the closer your line is to your original line which creates more Anchor Points and the lower the Fidelity the fewer Anchor Points and the straighter  your line. Smoothness controls how much smoothing is applied to the line once you have drawn your line. The higher the value the soother the line and the lower the value the closer to the original line.
Experiment with these settings to get your preferred results.

Keep Selected and Edit Selected Paths can be helpful also. Keep Selected will keep the path selected once you have completed your line and if you have Edit Selected Path enabled drawing over the line a second time will change the path.

Monday, 13 February 2012

Polaroid effect in Photoshop

Here are two different ways of creating a faux Polaroid effect using Photshop.
Polaroid 1
Polaroid 2
And here are some frames, you just need to remove the black inner and place your image behind.

Friday, 10 February 2012

Drawing without the Pen Tool

I'd recommend you watch this Lynda.com tutorial on drawing without using the Pen tool if you are having difficulty getting to grips with it. It is quite lengthy but worth watching from start to end.

Remember to access this via your UniHub login to get the whole chapter.


Friday, 27 January 2012

Constrain your drawing.

A helpful tip to enable you to draw at a specific angle. Think isometric.

Wednesday, 9 March 2011

Photoshop: Layer Mask.

Rather than using the eraser tool to delete portions of an image (because once pixels are gone they are gone) why not use a layer mask.

Masks are a way to hide portions of an image on lower layers based on areas of black or white, including levels of grey.

Once you understand what the layer mask is doing and how it works you can achieve much more than just using the eraser tool.
The example below shows a layer mask that has been added to the top layer.
Click on the images to get a larger view.


The layer mask is the black and white thumbnail to the right of the image in the layers palette. It is important to notice when the layer mask is selected by the frame around it's thumbnail.


The black ink on the mask thumbnail can thought of as a hole that is cut through the image revealing the layer below.


This also works with values of grey. In the example above the gradient runs from black to white through grey values. So painting with grey ink will make the underlying image semi-opaque.
The mask becomes really useful once you realise that you removed something from an image you thought you didn't need. You can alway go back and paint with white to restore the image.

Look at this link for a fuller explanation of using the layer mask.


What is a layer mask?

View this entire Photoshop course and more in the lynda.com Online Training Library®.

Monday, 29 November 2010

Using the Pathfinder in Adobe Illustrator

To make new shapes from overlapping objects.

1. Select the objects you want to affect with the Select Tool, black arrow (v)

Original shapes


2. In the Pathfinder palette click on each button to either: Unite, Minus Front, Intersect or Exclude.
The top row of buttons effect the whole shape and the bottom row of buttons effect the paths that make up the shape.

Unite


Minus Front


Intersect


Exclude


3. Some actions will be different depending on which shape is above the other.
4. Summary of the Pathfinder types 
http://bit.ly/giGTpg
5. Explanation and examples of each 
http://bit.ly/9BmrIO


Thursday, 9 October 2008

Remove fringe. 03

A further technique and possibly the better of the three is to use the Clone Stamp tool.
This technique has the advantage of giving you more control in the colour, tone and placement of the pixels.

1. First we must lock the transparent pixels in the layer. Ensure you are targeting the correct layer. As before the background should be transparent.


2. Select the Clone Stamp tool and set the mode to Darken. A low flow rate will give you more control.


3. Sample pixels close to the area you are cloning, this way the pixels will be of similar tone, colour etc. Remember to keep resampling the area to break up any patterns that can develop with this tool.


What you may find in this instance is that the strands of hair become thicker and heavier and might even reveal strands or pixels that you couldn't see previously.

Remove fringe. 02

So if you find that the removal of the white fringing from the previous technique didn't quite cut it, I'd recomend this next step to further enhance the results.

It is quite straight forward really, what we are going to try and achieve is to darken, selectively parts of the image.


Here is the image as it ended up in the previous technique. What you might be able to pick out are the small areas of lighter pixels around the finer parts of the strands of hair.

Here is the example in detail.


1. We need to select the Burn tool and change the range to Highlights. This way only the light pixels will be affected.

2. Now apply the Burn tool to the light edge darkening any fringe remaining. Be careful not to darken into the image too much or you will end up with an obvious dark shadow around the image.


As mentioned in the Russell Brown tutorial there is another slightly better technique that could be used in this instance which follows.

Friday, 3 October 2008

Remove fringe. 01

This technique works best I find with images that are dark but have a light or white fringe from the background, so can be quite limited in it's usage.


Here is the original QT Movie from The Russell Brown Show.

A quick distillation of the process involved.

1. Delete as much as possible of the background to transparency, possibly leaving you with a white fringe around the edge.
2. If you change the blend mode of the layer with the fringe to Multiply you will get an idea of the resulting edge quality.
3. Change the layers blend mode back to Normal if not already.
4. In the layers palette double click to the right of the text, this will open up the Layer Style dialogue box.


5. Tick the Inner Glow style checkbox and click on the name Inner Glow to open this into the right hand panel.
6. Change the Blend mode to Multiply and select black as the solid colour. You could also click in the main image and pick a tone from here.
7. Change the Technique to Precise this can give you a better edge.
8. The size in pixels will determine how much of the edge detail will be effected.
9. Adjust the Opacity to give you a more subtle blend.

Some parts of the image may still need to be tweeked. If so then I'd recomend this next process...

Thursday, 2 October 2008

Photoshop tips.

I've decided to create a whole lot of blog to record helpful Photoshop and Illustrator techniques. Primarily of course to help and inform but also to collate a body of knowledge should I loose my notebook.

I can't make any claim to have invented all of these techniques by myself but most have been found lying around here and there, as one does. I'll post all the relevant links to the originals where I can.

Because I find it frustrating trying to find interesting and useful Photoshop techniques from reams of pages of poop, hopefully this might act as some kind of poop-filtering-collator.

Finally, if you find something of interest please post a comment here and spread the word.
And if you wish to be a regular contributor please ask and I'll send you an invite to become an author.


Chris.