Monday, 18 February 2013

Preparing a simple path for the laser cutter.

One of the most basic things you can do with the laser cutter is trace an outside path of a shape to be cut out from sheet material. Like the previous posting on laser cutting please speak to your friendly technician to advise you on the use of appropriate materials.

You will also need the line you draw saved at a specific colour and width, again check with the technician who will be running the job.

This method shown below is to draw the path freehand, using the Pencil Tool. This is a basic drawing tool that will automatically place Anchor Points at regular intervals. The downside is that it is not very accurate a drawing method and for accuracy you will need to edit and tidy up any lines afterwards.

1. Place the image you want to trace by using File, Place... and select the image.

2. Before you place the image you can select the checkbox allowing you to add the file as a Template.
This will lock the image, dim it slightly and create a new layer for you to draw into in one go.
Depending on the original size of the image you place you might need to resize it to make it bigger or smaller. If you do you will need to unlock this first in the Layers Panel. Re-lock it once you have made any adjustments as you don't want to draw on this layer or have it move.

3. With your new layer selected select the Pencil Tool and start to draw around your image.
You will probably find it quite difficult to draw an accurate line with the Pencil Tool and the line will look very shaky. It will appear this way until you release the mouse button at which point the line will smoothen out and look better.
4. The line will probably need editing so that it is in the correct position, ready for cutting.
You can redraw the line to change it but first you will need to check a couple of settings for the Pencil Tool.

5. Double Click on the Pencil Tool. This will open the Pencil Tool Options. Make sure Keep Selected and Edit Selected Paths are checked.

6. With the path you have just drawn, click and drag to redraw a new line. This will replace the original one. This can produce unpredictable results sometimes so be ready to Undo and try again. Reducing the Fidelity can help here.

7. If you need still smoother lines you can use the Smooth Tool which is found by click holding on the Pencil Tool or if you already have the Pencil Tool selected by holding down the Alt key.

Each time you draw over the existing path the line will become smoother.

8. Depending on the complexity of your shape you can edit this line as you go using the Direct Selection Tool or using the Pen Tool.

You will also need to think about making sure your lines are joined together and continuous ready for the laser cutter to follow. Use this blog entry for more info.

Tuesday, 12 February 2013

An easier way to draw. The Pencil Tool.

The Pencil Tool in Adobe Illustrator allows you to draw freehand paths that you can edit later on.
Some if not most will find this method of drawing easier that using the Pen Tool. The downside is that the line you end up with will need refining and editing to make it more accurate. There are settings for this tool that you can tweak to make life easier for yourself. You will also find that if you are drawing using a Wacom Graphics Tablet instead of mouse, the results will be better already.

The Pencil Tool (shortcut N) draws a line where you drag the cursor and will add Anchor Points automatically along its length.

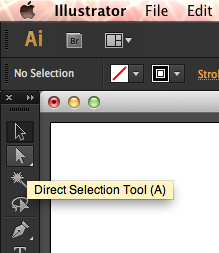
This line will usually need to be edited and refined using the Direct Selection Tool (shortcut A)

Hidden under the Pencil Tool is the Smooth Tool which will smooth the line you have just drawn with each pass. You can also access the Smooth Tool by holding down the Alt key when you have the Pencil Tool selected. This saves you time by not having to switch between one tool and the other.

If you double-click on the Pencil Tool you get access to the Pencil Tool Options. Here you can set the Fidelity and Smoothness of the line you draw. The higher the Fidelity, the closer your line is to your original line which creates more Anchor Points and the lower the Fidelity the fewer Anchor Points and the straighter  your line. Smoothness controls how much smoothing is applied to the line once you have drawn your line. The higher the value the soother the line and the lower the value the closer to the original line.
Experiment with these settings to get your preferred results.

Keep Selected and Edit Selected Paths can be helpful also. Keep Selected will keep the path selected once you have completed your line and if you have Edit Selected Path enabled drawing over the line a second time will change the path.

Tuesday, 13 March 2012

Using Live Trace to prepare for the laser cutter

The laser cutter needs to a path to cut along and it is Adobe Illustrator you use to make that path.
By using Illustrator you can make a path that is accurate and in exactly the right position but there is some preparation that needs to be done first.

The image you start with makes a big diference to how much work you have to do in editing or tidying up the result. The better the quality of the original, the better the tracing. A low resolution image from the internet will trace badly, not have enough detail and require you to tidy-up or redraw missing parts. It may help if open the image in Photoshop first to increase the contrast making the image easier to trace.

Important! This process is one small step in preparing your artwork for the laser cutter. It is important that you speak to the technician who will be helping you run the actual job to advise you on material suitability, time, availability etc. Basically can it be done as I expect?


1. Place your image into Illustrator using File>Place... and selecting the image from your computer.

2. With the image selected, open the Tracing Presets and Options (a small down pointing arrow) and select the Tracing Options...

3. Selecting this will open the following dialogue box. Here you can adjust settings according to the image you are using and the result you require. In preparing your image for use on the laser cutter you might want to start by duplicating the settings shown ensuring you are tracing Stokes and not Fills.

4. Depending on the size and resolution of the image it will process and show the result.
You can't edit the tracing until you have clicked on the Expand button.


5. The result you get might contain a number of different stroke widths and the laser cutter will need a single width line to follow, it will also make your editing task easier to see. With all the paths selected click on the Stroke Weight drop-down and select a small point size. This example is highly detailed and would not be suitable as it would burn away most of the material in the process. Again, speak to your friendly local technician for advice.


6. You will now need to spend some time deciding what parts to delete, what parts to keep and how to make a path that is suitable for use on the laser cutter.
If you double-click on the tracing with the Selection Tool (black arrow) you will enter Isolation Mode. With this mode you can edit individual parts inside the grouped object. You will know that you are in Isolation Mode by the grey bar that appears above your image. To exit, press esc on your keyboard or click on the left pointing arrow in the grey bar.


Tuesday, 14 February 2012

Fabric prints online

This looks interesting. Spoonflower, based in the US but will ship internationally and stock nine different types of fabric. What a good idea, I'm might give it a go myself.

Create seamless patterns online

Colourlovers.com has a nice page where you can create seamless auto-repeating patterns and let the rest of the community colourise them for you. As well as other colour related info.

Monday, 13 February 2012

Polaroid effect in Photoshop

Here are two different ways of creating a faux Polaroid effect using Photshop.
Polaroid 1
Polaroid 2
And here are some frames, you just need to remove the black inner and place your image behind.

Friday, 10 February 2012

Drawing without the Pen Tool

I'd recommend you watch this Lynda.com tutorial on drawing without using the Pen tool if you are having difficulty getting to grips with it. It is quite lengthy but worth watching from start to end.

Remember to access this via your UniHub login to get the whole chapter.


Monday, 30 January 2012

Fashion Illustrator books in the library

We have a number of titles in the library that you might find helpful.
Creative fashion design with Illustrator / Kevin Tallon.
Technical drawing for fashion / Basia Szkutnicka.
Fashion designer's handbook for Adobe Illustrator / Marianne Centner and Frances Vereker.

If you browse around in this section of the library you will find other related books.

Illustrator Pen tool exercise

Click here, save and open this file:

Download the Pen tool exercise

Originally from here.

Friday, 27 January 2012

Inspiration

Not fashion related but good to see what is possible in vector form using Illustrator.
Vectips.com a good place to go to regularly.

Seamless repeating Mexican Pattern

Create a seamless repeating Mexican Pattern from DigitalArts Magazine bringing together some of the content from the Illustrator workshops for fashion students.

Constrain your drawing.

A helpful tip to enable you to draw at a specific angle. Think isometric.

Friday, 25 November 2011

Back To Basics

The dreaded pen tool.

The pen tool will easily be your biggest enemy when learning to draw in Illustrator but be your best friend when you have mastered how to use it.

You can of course use the pencil tool to draw in a more intuitive and direct way but doing so creates more work for yourself that needs tidying up later with spare anchor points and stray lines everywhere. Not helpful when you are trying to draw an accurate and precise flat drawing or spec sheet.

Remember that drawing in Adobe Illustrator is like putting pegs in a board and attaching string from one peg to the next. Unlike Adobe Photoshop which is more akin to traditional drawing ink on paper.

In Photoshop if you want to edit a line you may use the eraser and repaint your line in its new place.
In Illustrator if you want to edit a line you just need to more the pegs and the string follows.
Drawing in Illustrator is like placing the start and end points, Illustrator will draw the bits in between.

Comprehensive guide

What's in a drawing?

I have downloaded a flat from the WGSN Resource Library and exploded it so you can see what makes up the flat. What at first can look involved and complicated in fact is simple.

Tuesday, 24 May 2011

Pleats please.

Somebody asked me if there was an easy way to create a basic pleat in Illustrator.
Pleats can be drawn as a row of parallel lines, each one the same as the next.

But what if those pleats are more fluid, change their profile from one to the other and you want them to blend smoothly.
Then you might want to try using the Blend tool.


1. Draw your two lines, the start and the end profile.

2. Select both lines and in the Menu bar select Object, Blend, Blend Options...

3. In Blend Options you can specify how the blend is made. For this example use the following:
4. Next select again from the Menu bar, Object, Blend and this time Make Blend.
5. You will end up with a smooth blend from one shape to the next in the number of steps you specified.

6. You can change the shape of the blend by selecting one of the start or end profiles with the Direct Selection tool and just reshaping it. The blend will refresh itself.

7. To use these lines as part of your drawing you will need to Expand its appearance.

This will let you add, remove and edit each line individually.


Search: blend tool illustrator fashion videos

Search: blend tool illustrator


Wednesday, 4 May 2011

Colour mixing online

Have a look at this if you are looking for some colour inspiration or a way to create, save and swap colour palettes:

http://kuler.adobe.com
You can register and save all your custom palettes to be used in Photoshop and Illustrator.
For example:
http://kuler.adobe.com/#themeID/75242
http://kuler.adobe.com/#themeID/106002

You are even able to make a palette from an image you upload or have loaded into Flickr
http://kuler.adobe.com/#create/fromanimage

Here is a video explaining briefly how to use Kuler

You can also have a look at ColourLovers for more colour and pattern palettes.
http://www.colourlovers.com

Wednesday, 6 April 2011

Comprehensive Guide to all the brushes

Here is a very comprehensive guide to all the Brushes available to you in Adobe Illustrator.

Thursday, 31 March 2011

Creating Repeating Pattern Swatches

Make a new document.
Make a square of equal height and width.
This will be your guide square for the repeating pattern. The main body of the pattern should lie inside the square and overlapping the square will be repeated elements.

In the layers palette you will need to temporarily lock this layer.
Make a new layer, this will be the layer you will draw your pattern on.
When you draw your pattern elements think of how they will repeat from left to right and top to bottom.
Where the elements cross over the edges of the square this is where they will be repeated.

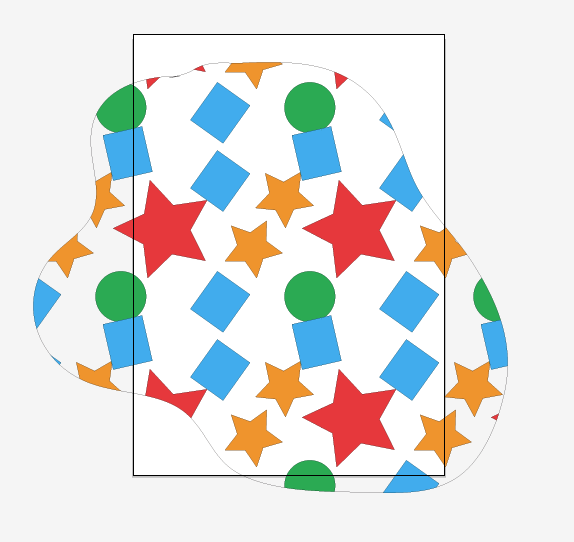
Start by concentrating on all the elements on the left that overlap the edge of the square. These will need to be copied over to the right. In this example the red star and one of the blue rectangles.
Click on one of the elements and select Object > Transform > Move...
You will be moving the element Horizontally the same width of the guide square, 200 mm in this case. If you select Preview you will be able to see where it will be moving to. Click Copy to make a copy of the element. Repeat with any other shapes crossing the left side of the guide square. Tip: you can quickly repeat the last transformation by pressing Cmd and D.

To move elements from right to left type -200mm
You can now concentrate on the elements to move from top to bottom. To do this you will need to type 200mm Vertical and click Copy. Again any elements to move from bottom to top will need to move -200mm
You should end up with an arrangement of elements overlapping the guide square repeating left to right and top to bottom.

You will now need to unlock the guide layer and select the square guide. You can do this all from the Layers palette.

Remove all of the guide square fill and stroke colour and ensure that this object is the back most object by selecting Object>Arrange>Send to Back.

Select all of the elements including the guide square and drag them into the Swatches palette.
You will see a new thumbnail appear here that you can now apply to any shape as a fill pattern.
Test your new pattern. If you need to make any changes you can edit the original and add it again.

Here is a much more in-depth tutorial on patterns from Digit Mag
and here is the The Adobe manual explanation of patterns.


Thursday, 24 March 2011

Effects, Alignments and Pathfinder video

Here is a short 8min video tutorial on using some of the Effects, Alignments and Pathfinder operations in Illustrator from a nice site, Method & Craft. He's quick so you may need to watch it a few times. Hopefully they will be adding more videos and tutorials soon.

The Pathfinder operations in particular I think will be most useful for creating more complex shapes in your drawings.

Thursday, 17 March 2011

Zooming in, zooming out, zooming in...

Save yourself the headache of constantly zooming in to work on detail and then having to zoom out again to get an overview of the whole image.

Go to Window and make a New Window. This will give you a second view of the same document.
Make one of the windows zoomed in to work in detail and the second one zoomed out to work at a distance.


The clever thing is now to learn the keyboard shortcut to switch between the two.
Hold the cmd and tilde key, which looks like this.
You can then quickly move back and forth between the two with the shortcut and any changes to the drawing you make in one will be changed in the other. Nice.