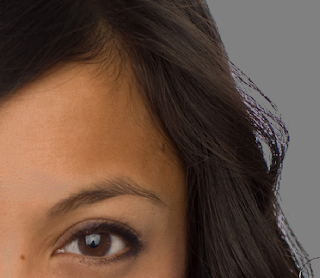
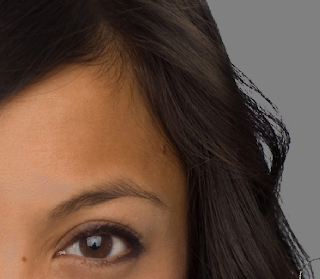
It is quite straight forward really, what we are going to try and achieve is to darken, selectively parts of the image.

Here is the image as it ended up in the previous technique. What you might be able to pick out are the small areas of lighter pixels around the finer parts of the strands of hair.
Here is the example in detail.

1. We need to select the Burn tool and change the range to Highlights. This way only the light pixels will be affected.

2. Now apply the Burn tool to the light edge darkening any fringe remaining. Be careful not to darken into the image too much or you will end up with an obvious dark shadow around the image.

As mentioned in the Russell Brown tutorial there is another slightly better technique that could be used in this instance which follows.
No comments:
Post a Comment