One of the most basic things you can do with the laser cutter is trace an outside path of a shape to be cut out from sheet material. Like the previous posting on laser cutting please speak to your friendly technician to advise you on the use of appropriate materials.
You will also need the line you draw saved at a specific colour and width, again check with the technician who will be running the job.
This method shown below is to draw the path freehand, using the Pencil Tool. This is a basic drawing tool that will automatically place Anchor Points at regular intervals. The downside is that it is not very accurate a drawing method and for accuracy you will need to edit and tidy up any lines afterwards.
1. Place the image you want to trace by using File, Place... and select the image.

2. Before you place the image you can select the checkbox allowing you to add the file as a Template.
This will lock the image, dim it slightly and create a new layer for you to draw into in one go.
 Depending on the original size of the image you place you might need to resize it to make it bigger or smaller. If you do you will need to unlock this first in the Layers Panel. Re-lock it once you have made any adjustments as you don't want to draw on this layer or have it move.
3. With your new layer selected select the Pencil Tool and start to draw around your image.
You will probably find it quite difficult to draw an accurate line with the Pencil Tool and the line will look very shaky. It will appear this way until you release the mouse button at which point the line will smoothen out and look better.

 4. The line will probably need editing so that it is in the correct position, ready for cutting.
You can redraw the line to change it but first you will need to check a couple of settings for the Pencil Tool.
5. Double Click on the Pencil Tool. This will open the Pencil Tool Options. Make sure Keep Selected and Edit Selected Paths are checked.

6. With the path you have just drawn, click and drag to redraw a new line. This will replace the original one. This can produce unpredictable results sometimes so be ready to Undo and try again. Reducing the Fidelity can help here.
 7. If you need still smoother lines you can use the Smooth Tool which is found by click holding on the Pencil Tool or if you already have the Pencil Tool selected by holding down the Alt key.

Each time you draw over the existing path the line will become smoother.
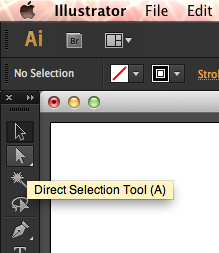
8. Depending on the complexity of your shape you can edit this line as you go using the Direct Selection Tool or using the Pen Tool.
You will also need to think about making sure your lines are joined together and continuous ready for the laser cutter to follow. Use this blog entry for more info.
You will also need the line you draw saved at a specific colour and width, again check with the technician who will be running the job.
This method shown below is to draw the path freehand, using the Pencil Tool. This is a basic drawing tool that will automatically place Anchor Points at regular intervals. The downside is that it is not very accurate a drawing method and for accuracy you will need to edit and tidy up any lines afterwards.
1. Place the image you want to trace by using File, Place... and select the image.

This will lock the image, dim it slightly and create a new layer for you to draw into in one go.

3. With your new layer selected select the Pencil Tool and start to draw around your image.
You will probably find it quite difficult to draw an accurate line with the Pencil Tool and the line will look very shaky. It will appear this way until you release the mouse button at which point the line will smoothen out and look better.


You can redraw the line to change it but first you will need to check a couple of settings for the Pencil Tool.
5. Double Click on the Pencil Tool. This will open the Pencil Tool Options. Make sure Keep Selected and Edit Selected Paths are checked.


Each time you draw over the existing path the line will become smoother.
8. Depending on the complexity of your shape you can edit this line as you go using the Direct Selection Tool or using the Pen Tool.
You will also need to think about making sure your lines are joined together and continuous ready for the laser cutter to follow. Use this blog entry for more info.