There are a few ways to create a double line, some editable some not. Here are the ways I have discovered so far. It's up to you to choose the best method for you.
You could use the Outline Path method:
This involves enlarging the line, outlining its path, giving it no fill and a coloured stroke.
Outline method
Or you could create a custom brush:
By making a square guide shape, drawing the pattern you want repeated inside, removing the stroke colour of the guide square and adding to the Brushes palette.
Brush method
Or using the Appearance panel create a line that has two stroke paths, one above the other.
Appearance method
Or use something called a Knockout:
Knockout method
These are arranged in order of difficulty from easiest to most complicated and some are more flexible than others.
Wednesday, 15 December 2010
Using the Appearance panel to make a dashed line
You can use the Appearance panel to change the attributes that make up the object. You are able to change the colour of the fill, stroke, it's opacity, it's colour mode and add effects to change its appearance.
So the example shown here has a 2pt black stroke and no fill.


To create a double stitch line you will need to reverse the layers. The dashed line below and the solid line above.


So the example shown here has a 2pt black stroke and no fill.

You can also add multiple attributes, all in the same object. These attributes can be treated like layers.
Moved one above the other enabling you to change the stacking order.
So the example below is still one object, just with three individual strokes applied. Black at 5pt, Yellow at 10pt and Red at 20 pt.
The visibility of each layer can be turned on or off by clicking on the eye icon.

You can see here in the next image how I have managed to crate the illusion of a dashed line.
You will need to set the Dashed line above the solid line and make it slightly wider. If it's the same size even you will see a slight outline around the clear or white part.


The main problem with this method is that the dashed line will work when over a white background or whatever colour the dash is in, but not work if over a different colour. In this example the green shape.
You also can't have true stitch lines with rounded ends, only square end caps or Butt Caps.
To create a double stitch line you will need to reverse the layers. The dashed line below and the solid line above.

Masking in Photoshop, without masking.
How to mask without masking in Photoshop by Russell Brown
If you have a chance to check the Russell Brown website. He used to work for Adobe Systems and knows his stuff. You can also see his tutorials here at Adobe TV.
If you have a chance to check the Russell Brown website. He used to work for Adobe Systems and knows his stuff. You can also see his tutorials here at Adobe TV.
Saturday, 4 December 2010
Starting from scratch...
So you have a flat to draw and are stuck for where to start.
Try this:
In reality the garment is made up of separate shapes of fabric. The sleeve is going to be a separate shape, as is the cuff, as is the front panel and the collar stand etc. So think of the illustration as being made of separate drawn shapes. Some shapes can be placed on top of others and some below. The ones on on top can hide the ones below.

A frequent misconception is that when drawing like this some feel you have to make the drawing in one continuous line from start to end. But when you draw with pencil on paper, you take the pencil off of the paper, place it somewhere else, continue and so on. Breaking the drawing down to parts can make it easier to understand.
Wednesday, 1 December 2010
Getting a handle on the Pen tool.
Learning how to use the Pen tool in Adobe Illustrator can appear to be a bit of an uphill struggle sometimes but persisting and practicing will pay off eventually. Within a short space of time you will be able to draw much quicker and more accurately.
Remember the curve has three parts to it. The anchor points, the line and the direction handle. Without any direction handles the line will be straight.
Where you do have a direction handle it pulls the curve toward it, changing it's shape.

You can think about the curve made from a wooden board, two nails and elastic stretching between the each.
 To practice drawing with the Pen tool, single-click with the mouse to draw straight segments.
Or click-hold and drag to create the direction handles and curve lines.
Have a look at this comprehensive guide to find out all of the tips and shortcuts for this tool.
Comprehensive guide
Remember the curve has three parts to it. The anchor points, the line and the direction handle. Without any direction handles the line will be straight.
Where you do have a direction handle it pulls the curve toward it, changing it's shape.

You can think about the curve made from a wooden board, two nails and elastic stretching between the each.

Or click-hold and drag to create the direction handles and curve lines.
Have a look at this comprehensive guide to find out all of the tips and shortcuts for this tool.
Comprehensive guide
Here is an exercise to practice with.
Monday, 29 November 2010
Using the Pathfinder in Adobe Illustrator
To make new shapes from overlapping objects.
1. Select the objects you want to affect with the Select Tool, black arrow (v)

Original shapes
2. In the Pathfinder palette click on each button to either: Unite, Minus Front, Intersect or Exclude.
The top row of buttons effect the whole shape and the bottom row of buttons effect the paths that make up the shape.

Unite

Minus Front

Intersect

Exclude
3. Some actions will be different depending on which shape is above the other.
4. Summary of the Pathfinder types
http://bit.ly/giGTpg
http://bit.ly/giGTpg
5. Explanation and examples of each
http://bit.ly/9BmrIO
http://bit.ly/9BmrIO
Making Pattern Brushes in Adobe Illustrator
To create a pattern brush to apply different stitch styles and build a library.
“Pattern brushes Paint a pattern—made of individual tiles—that repeats along the path. Pattern brushes can include up to five tiles, for the sides, inner corner, outer corner, beginning, and end of the pattern”
Explanation of the different types of brushes: http://bit.ly/h469EC
1. Create square with no fill and black stroke to contain the pattern.

2. Draw the stroke element within the square. To have a smooth repeat the left and right parts should align.

3. Remove the stroke for the guide square.

4. Select all the elements. The guide square and inside lines.
5. Drag to the Brushes palette to make a new brush. Select Pattern Brush.


6. Under Colourisation Method, select Tints to be able to change the colour of the stitches.

7. To make a basic brush with no corner elements, accept the default settings.
8. If you want to have inside and outside corner parts add the elements to the Swatch palette. Double click the brush you want to change in the Brushes palette and add corner elements from the Swatch palette in the list that appears.
9. Test with a curved path.

Make a dashed line in Adobe Illustrator
Make a dashed line that will represent a stitch on a flat drawing for the collar, cuff and hem.


1. Select the collar line with the Direct Selection tool. White arrow (a).

2. Copy, Paste in Front.
3. Increase the width of the stroke.


5. Select No Fill and Black Stroke.

6. Using the Direct Selection tool (a) delete the unwanted parts of the line.

7. Select the line you want to make dashed with the Selection tool, black arrow (v).

8. Using the Stroke palette make the line dashed.

9. With the Scissors tool (c) cut any unwanted parts of the line and delete.

10. Repeat steps 1-9 for the cuff and the hem.
11. To apply the same dash detail to the other parts of the drawing select the Eyedropper tool (i)

12. Click on the dashed line to copy the line style.
13. Alt-Click on the cuff and hem lines to paste the line style.
Joining Anchor points in Adobe Illustrator
1. Select both anchor points using the Direct Selection tool (a), click and drag a marquee around both to select both at once.
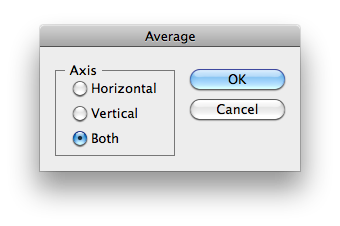
 2. Select Object, Path, Average... and pick both in the following dialogue box. This will move both anchor points on top of each other.

 3. Select Object, Path, Join and pick either Corner or Smooth depending on the type of line you want.


Friday, 5 November 2010
Delicious Bookmarks
Adobe Illustrator workshop for Fashion Students
Follow this link to yet another blog site to get access to my lesson plan for the workshops.
http://wp.me/p1b20N-4
These workshops are for the first year fashion students at who are starting to venture into Adobe Illustrator for the first time to create garment flats. This will be a workshop of 3 sessions.
http://wp.me/p1b20N-4
These workshops are for the first year fashion students at who are starting to venture into Adobe Illustrator for the first time to create garment flats. This will be a workshop of 3 sessions.
Subscribe to:
Comments (Atom)